A grilled sandwich is a simple but mouth-watering sandwich with crumbly bread and melted cheese. If you need an easy snack or meal, making a grilled cheese sandwich only takes a little time to prepare. Make your sandwich in your oven or on the stove for the best bake. You can even utilize your microwave or toaster if you’re in a rush. Once you try authentic grilled cheese, try out adding various ingredients and flavors to make your sandwich distinctive!
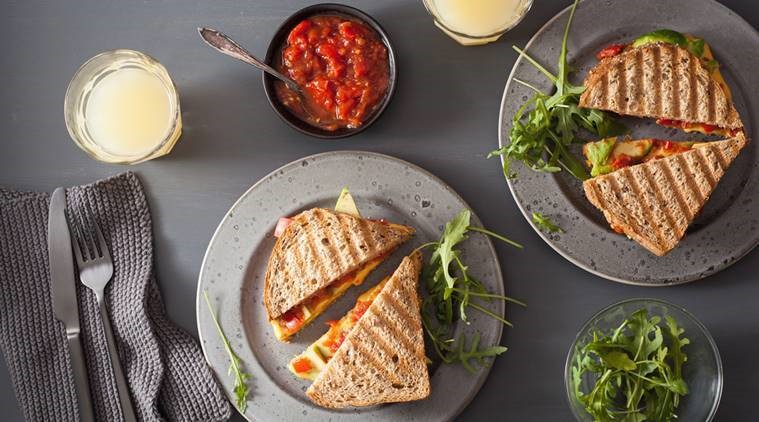
It won’t be an overstatement to say that on a lazy day, these sandwiches are a rescuer. A comfort meal for many, this easy-to-make intricacy has many versions. Over the years, the repository of recipes has only raised and it’s not amazing. After all, who doesn’t admire the gooey goodness of hot grilled bread and melted cheese with a certain sumptuous filling?
Table of Contents
Ingredients
- room temperature (butter or margarine substitute work too), 1 tablespoon (14 g) of butter
- 2 slices of bread
- 1-2 slices of your choice of cheese
- Tomatoes (optional)
- Apple slices (optional)
- Deli meat (optional)
How to make a Classic healthy grilled sandwich
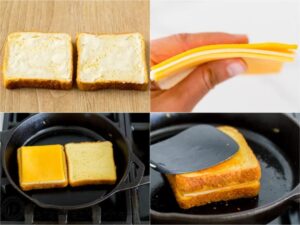
Butter a sole side on 2 slices of bread. Select your favorite kind of bread for your sandwich and take 2 slices from the bread loaf. Utilize room temperature butter so it’s easy to spread out and does not tear your bread. Coat a side of every piece of bread with the butter so it is crunchy up and doesn’t blaze when you put it in the pan.
Over medium heat, Preheat a non-stick pan to your stove
Set your non-stick pan to your stove and turn it on to higher heat. Let the pan heat up entirely before you put your bread on it so you acquire an even cook. Flip some drops of water on the pan, and if they crackle and evaporate straight away, your pan is hot enough for the sandwich. Don’t retain the heat too high to your stove or else it might burn up the bread without melting up the cheese.
Gather your sandwich in the pan
Once the pan is pretty hot, place the foremost slice of bread into the pan buttered-side down. Top the chunk of bread with 1-2 slices of your best-loved cheese, then keep the second slice of bread on top with a buttered side face-up.
- Indian cheese melts the easy way, but you can utilize any kind of cheese you need for your sandwich. Try utilizing or mixing various cheeses to modify the flavor of your sandwich.
- Try utilizing pepper jack, Gouda, Swiss, provolone, or cheddar for slightly various flavors.
- You might also try shredded cheese if you need it to melt faster.
Cook the bottom slice of bread a few times or until it gets golden brown
Let the bottom of the sandwich cook a few times so the bread gets crumbly. Lift the sandwich with a handgrip occasionally so you do check out the color of the bottom slice. Be cautious not to let the bread burn while it’s cooking. Don’t leave your sandwich ignored as it might burn or be a fire risk.
Flip the sandwich and cook another side for some time
Slide a turner underneath the bottom piece of bread and quick way turn over the sandwich so the buttered side of the second piece is face down. Press down on the sandwich with your handgrip to make certain the bread contacts the pan even manner. Let the sandwich cook another few times or until the bread has become golden brown and the cheese has softened.
- Be aware when you flip the sandwich since it can simply pull apart. Utilize your other hand to hold the bead in place as you upturn it.
- Overturn the sandwich over again if the foremost slice is undercooked so it can brown correctly and crisp up.
Cut the sandwich before platter it
Move the sandwich to a cutting board once it’s completed cooking. Utilize a paring knife and bread knife to cut the sandwich at an angle to support it cool off as you eat it. Dish up the sandwich while it is still hot.
- The cheese could be pretty hot, so take a tiny bit at first so you do not burn yourself.
- If you have remaining after the rest food has been used, cover them in foil or store them in an airtight vessel in the refrigerator for up to 1 week.